An overview of the development process can be found in the presentation Developing Tools for nanoHUB.org and also in the Hubzero Tool Developers Guide.
Note that tephra2 has been used as an example in this document. Replace tephra2 with the short name of your tool.
1. Go to “My HUB” and select “Start a new contribution” (which takes you to https://vhub.org/resources/new)
2. Select the type of contribution from the menu (“Tools” in this example)
3. Fill in the tool information and click “Register Tool”
4. Administrator needs to create the SVN repo (“Add Repo” in Contribtool) and also flip the status to “Created”. This will also create a project wiki (e.g., https://vhub.org/tools/tephra2/wiki) that can be accessed using your hub username and password.
5. Set up a directory structure within your workspace (https://vhub.org/tools/workspace) to develop the tool. We recommend ~/apps/tool with a directory for testing the source code (src) and for the tool subversion repository (repo)
#> mkdir -p ~/apps/tephra2/src
Additional packages might need to be installed into the workspace to support your application. Copy the source code into the ~/apps/tephra2/src directory and ensure that it builds in the workspace before proceeding.
6. User adds the source code to the subversion repository. Additional information about subversion can be found in the Tool Developers Guide under Using Subversion for Source Code Control
6a. Before uploading the code the repo must be checked out to the local client.
       #> cd ~/apps/tephra2
       #> svn checkout https://vhub.org/tools/tephra2/svn/trunk repo
The following directory structure will be created under ~/apps/tephra2/repo:
| bin | Compiled application binaries |
| data | Additional data (e.g., templates, etc.) |
| doc | Documentation |
| examples | Example files |
| middleware | The install process will place files here |
| rappture | The Rappture tool.xml and wrapper scripts |
| src | Source code to be built (must include Makefile) |
6b. Copy the source code into the src directory and modify any build scripts to reflect the new locations. Any binaries that are built should be placed into the ~/apps/tephra2/repo/bin directory. NOTE: A top-level Makefile must exist in ~/apps/tephra2/repo/src that will build the entire project.
6c. Create the ~/apps/tephra2/repo/rappture/tool.xml file that will be executed by Rappture. When Rappture executes it will parse the tool.xml file, collect any input from the user as specified by the < input > section, create a driver.xml file, and call the application specified by the < command > tag. The driver.xml file will be passed to this command and will contain a copy of the tool.xml file along with any user input embedded within the file.
6d. If creating a wrapper script (e.g., wrapper.pl) that will be called by Rappture, the <command> tag of the tool.xml file should call it. When Rappture calls the wrapper script it will augment the environment so that the project bin directory (e.g., /apps/tephra2/current/bin) is included in the path and will also define a “TOOLDIR” environment variable that can be used to access other directories such as $TOOLDIR/data and $TOOLDIR/examples. The wrapper should instantiate a Rappture object (which will parse the driver.xml file), extract any necessary information from the driver, and then execute the code necessary for running the application. The wrapper may add information to the output log or other elements specified in the section of the tool.xml file so that Rappture can display these for the user.
**Please see the ‘Notes’ section at the bottom of the page for more information
For example, if you wanted to call foo.py from within your tool.xml file, you would need to put the @tool/ macro before the name of your wrapper script (i.e. foo.py)
< command > python @tool/foo.py @driver < /command >
6e. Add the files to the project and then commit them, specifying only new files and/or directories. For example:
       #> svn add src/Makefile src/doc src/src src/utils rappture/Examples
       #> svn commit
6f. Select the “My code has been uploaded” link on the Contribtool page and waits for Hub administrators to install the application. This will change the tool status to “Uploaded”.
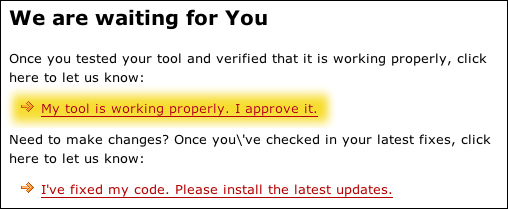
7. Once the Hub administrator has installed the tool you will receive an email that the status has been changed to “Installed. It is now up to the developer to test the tool and make sure that it is working correctly.

7a. If the tool is not working properly, changes must be made and then checked into the subversion repository. The developer then flips the tool status back to “Uploaded” and the Hub administrator updates the installation and testing continues.
#> svn update
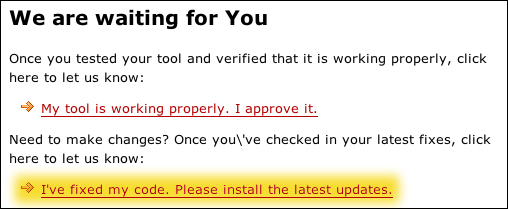
7b. Once the tool is working, the developer approves the tool and the Hub administrator publishes the tool and it is accessible on the “Resources: Tools” page
Notes
1. Tools are installed into /apps/{tool} (e.g., /apps/tephra2). The current version of the tool is /apps/{tool}/current/ while any updated versions are /apps/{tool}/dev/.
2. The installation process puts an invocation script into /apps/{tool}/current/middleware/invoke. This script typically contains:
/apps/rappture/invoke_app "$@" -t tool
The invoke_app script sets up the environment (such as TOOLDIR) that is passed into rappture and eventually passed to the wrapper script. If you’d like to invoke the development version of a tool directly for testing purposes, use the following command within a workspace:
/apps/tool/dev/middleware/invoke -r test
For example:
/apps/tephra2/dev/middleware/invoke -r test
3. In order to access example files, data, templates, etc. from the application directory you will need to use the $TOOLDIR environment variable. When the Hub executes rappture in the web browser it does not run from the application directory. For example:
   $toolDir = $ENV{'TOOLDIR'};
   $exampleDir = "$toolDir/examples";
   $dataDir = "$toolDir/data";
4. When the Hub runs an application, it stores the data in a session directory within the user’s workspace, typically ~/data/sessions/{session_id}/ . This can be used during troubleshooting.